SpringBoot场景启动器Starters是如何自定义的?具体操作展示
本篇文章将和大家分享一下 Spring Boot 框架中的 Starters 场景启动器的内容,关于 Starters 具体是用来做什么的,以及在开发 Spring Boot 项目前,要如何自定义一个 Starters 场景启动器。
一、Starters原理
1.1 Starters场景启动器
1、场景需要用到的依赖是什么?
比如依赖的jar
2、如何编写自动配置?
以WebMvcAutoConfiguration自动配置为例:
@Configuration
@ConditionalOnWebApplication
@ConditionalOnClass({ Servlet.class, DispatcherServlet.class,
		WebMvcConfigurerAdapter.class })
@ConditionalOnMissingBean(WebMvcConfigurationSupport.class)
@AutoConfigureOrder(Ordered.HIGHEST_PRECEDENCE + 10)
@AutoConfigureAfter({ DispatcherServletAutoConfiguration.class,
		ValidationAutoConfiguration.class })
public class WebMvcAutoConfiguration {

	public static final String DEFAULT_PREFIX = "";

	public static final String DEFAULT_SUFFIX = "";
@Configuration指定这是一个配置类
@ConditionalOnXXX 在指定条件成立的情况下自动配置类生效
自动装配顺序
在特定自动装配Class之前 @AutoConfigureBefore
在特定自动装配Class之后@AutoConfigureAfter
指定顺序@AutoConfigureOrder
@Bean 给容器中添加组件
@ConfigurationPropertie结合相关xxxProperties类来绑定相关的配置
@ConfigurationProperties(prefix = "spring.mvc")
public class WebMvcProperties {
}
@EnableConfigurationProperties 让xxxProperties生效加入到容器中
@Configuration
@Import(EnableWebMvcConfiguration.class)
@EnableConfigurationProperties({ WebMvcProperties.class, ResourceProperties.class })
public static class WebMvcAutoConfigurationAdapter extends WebMvcConfigurerAdapter {
}
配置自动装配Bean:
自动配置类要能加载
将需要启动就加载的自动配置类,将标注@Configuration的自动配置类配置在META‐INF/spring.factories下,自动配置类就会生效
# Auto Configure
org.springframework.boot.autoconfigure.EnableAutoConfiguration=
org.springframework.boot.autoconfigure.admin.SpringApplicationAdminJmxAutoConfiguration,
org.springframework.boot.autoconfigure.aop.AopAutoConfiguration,
3、模式
启动器(starter)
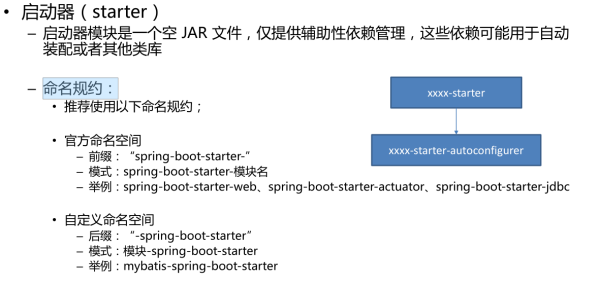
启动器只用来做依赖导入
专门写一个自动配置模块
启动器依赖自动配置,别人只需要引入启动器(starters)
mybatis-spring-boot-starter 自定义启动器名 -spring-boot-starter
二、自定义Starters
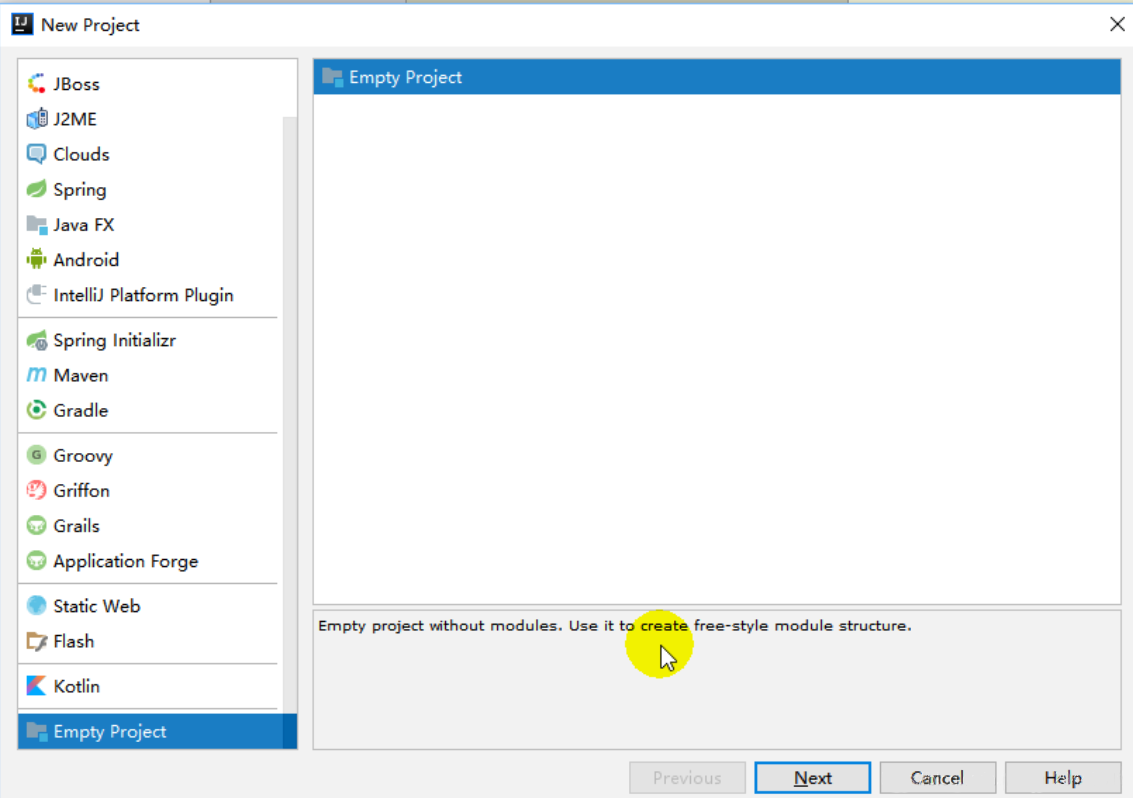
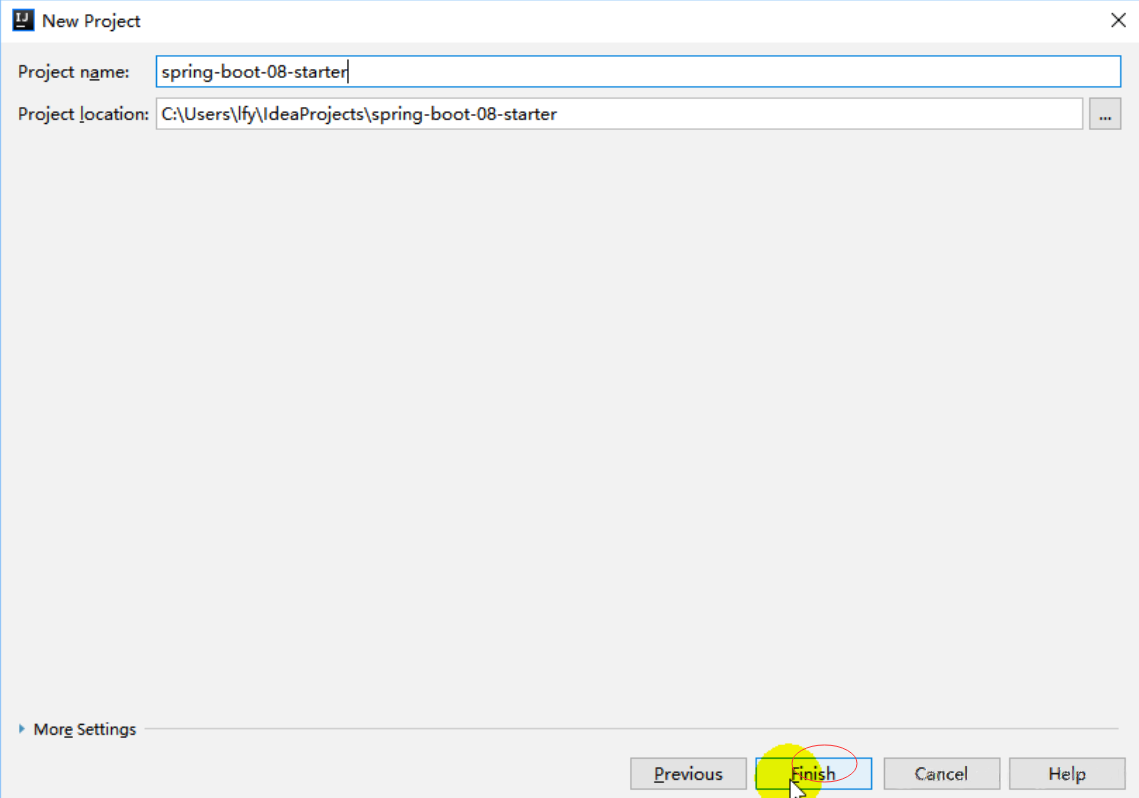
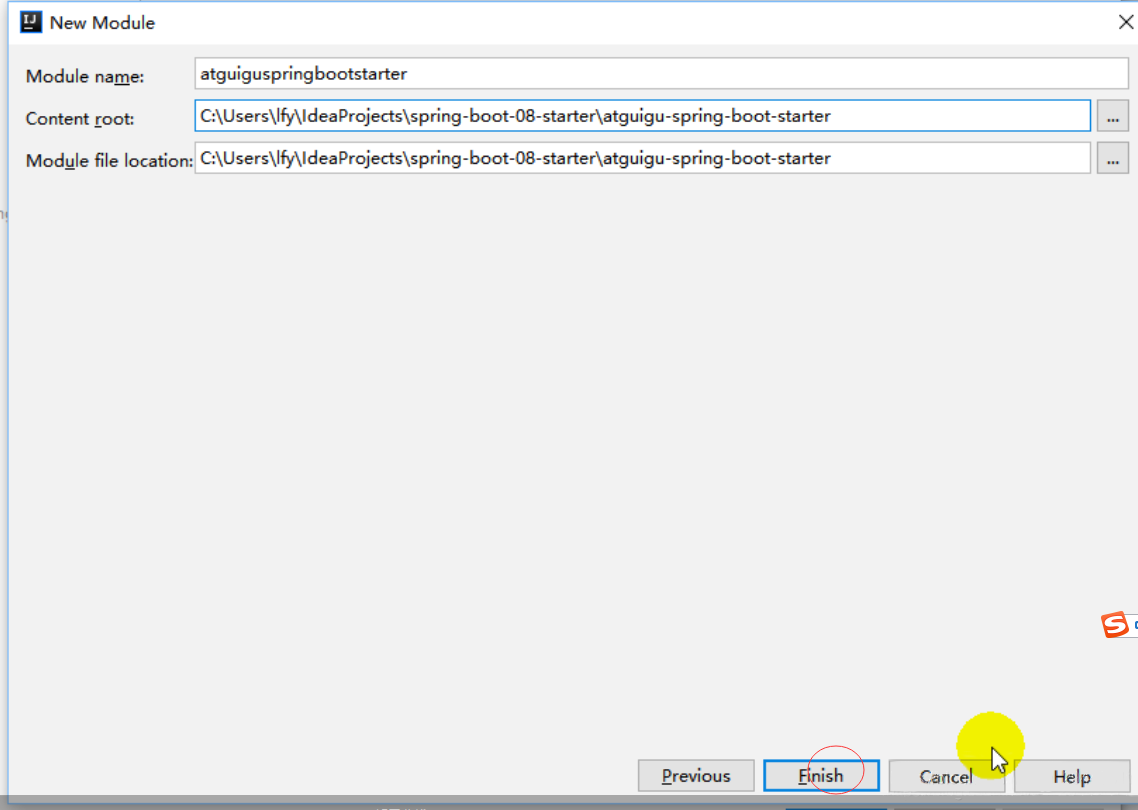
构建项目:
1.先创建一个空工程
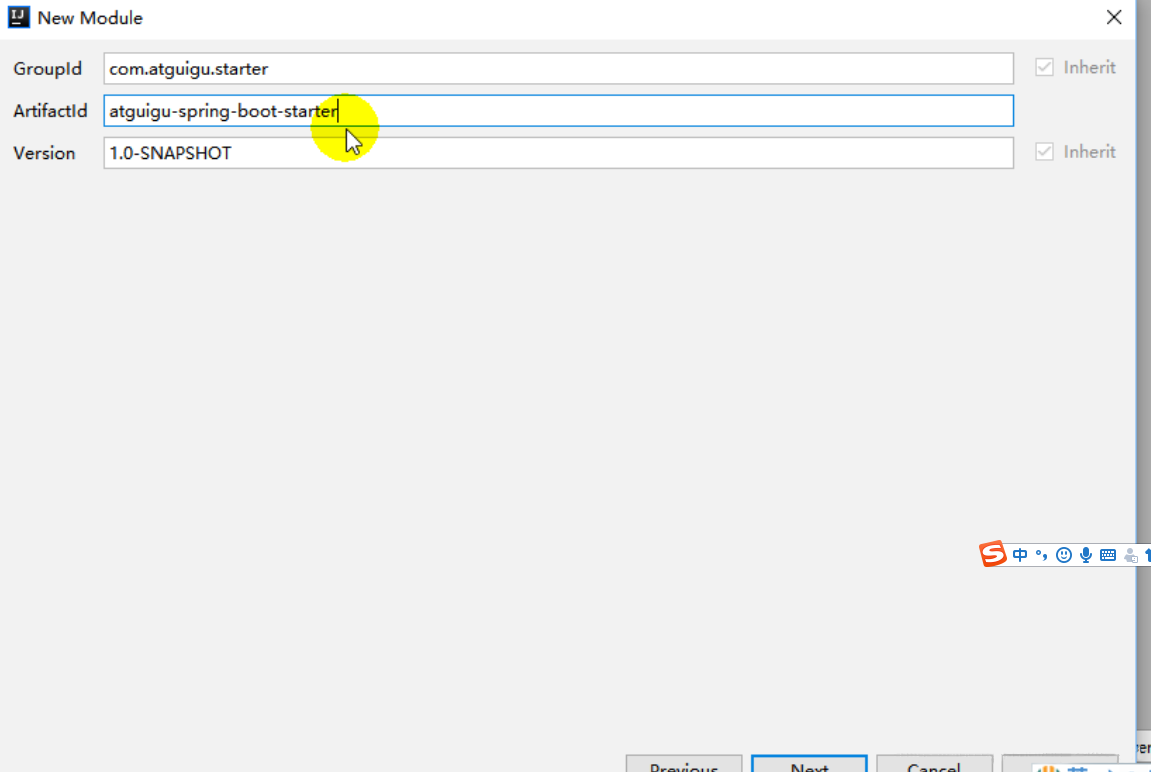
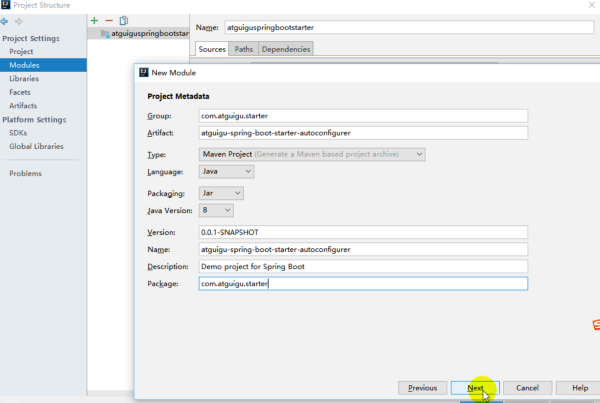
2、创建两个模块分别是启动器starter的maven模块和spring的初始化器创建的自动配置模块
启动器maven模块

自定义的starters
spring的初始化器创建模块(创建自动配置相关的模块)
三、代码步骤
在启动器starter的pom文件中引入配置类的坐标ming-spring-boot-starter-autoconfigurer
<?xml version="1.0" encoding="UTF-8"?>
<project xmlns="http://maven.apache.org/POM/4.0.0"
         xmlns:xsi="http://www.w3.org/2001/XMLSchema-instance"
         xsi:schemaLocation="http://maven.apache.org/POM/4.0.0 http://maven.apache.org/xsd/maven-4.0.0.xsd">
    <modelVersion>4.0.0</modelVersion>

    <groupId>com.ming.springboot</groupId>
    <artifactId>ming-spring-boot-starter</artifactId>
    <version>1.0-SNAPSHOT</version>

    <dependencies>
        <dependency>
            <groupId>com.ming.springboot</groupId>
            <artifactId>ming-spring-boot-starter-autoconfigurer</artifactId>
            <version>0.0.1-SNAPSHOT</version>
        </dependency>
    </dependencies>
</project>
写一个打招呼的功能
package com.ming.springboot;

/**
 * 打招呼的
 *
 */
public class HelloService {

    HelloProperties helloProperties;

    public HelloProperties getHelloProperties() {
        return helloProperties;
    }

    public void setHelloProperties(HelloProperties helloProperties) {
        this.helloProperties = helloProperties;
    }

    public String sayHello(String name){

        return helloProperties.getPrefix()+"-"+name+helloProperties.getSuffix();
    }
}
HelloProperties 和Helloservice 进行属性绑定的
package com.ming.springboot;

import org.springframework.boot.context.properties.ConfigurationProperties;

@ConfigurationProperties(prefix = "com.ming")
public class HelloProperties {

    private String prefix;

    private String suffix;

    public String getPrefix() {
        return prefix;
    }

    public void setPrefix(String prefix) {
        this.prefix = prefix;
    }

    public String getSuffix() {
        return suffix;
    }

    public void setSuffix(String suffix) {
        this.suffix = suffix;
    }
}
自动配置类
package com.ming.springboot;

import org.springframework.beans.factory.annotation.Autowired;
import org.springframework.boot.autoconfigure.condition.ConditionalOnWebApplication;
import org.springframework.boot.context.properties.EnableConfigurationProperties;
import org.springframework.context.annotation.Bean;
import org.springframework.context.annotation.Configuration;

@Configuration
@ConditionalOnWebApplication //web应用才生效
@EnableConfigurationProperties(HelloProperties.class)
public class HelloServiceAutoConfiguration {

    @Autowired
    HelloProperties helloProperties;

    @Bean
    public HelloService helloService(){

        HelloService  helloService = new HelloService();
        helloService.setHelloProperties(helloProperties);
        return  helloService;
    }

}
然后将这两个模块安装到maven仓库中
先安装配置模块因为starter模块依赖配置模块,别人调用我们的starter模块就行了
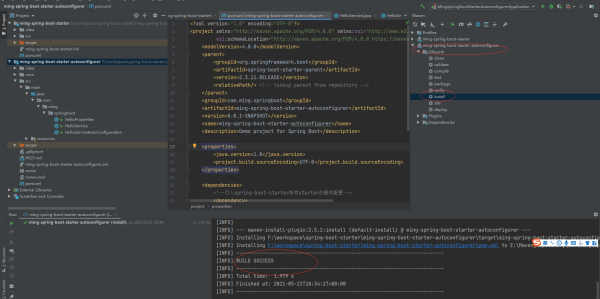
然后将启动器starter也装到仓库中,别人就可以用坐标引入了
在别的项目中引入自定义的启动器starter
   <!--引入自定义的starter-->
        <dependency>
            <groupId>com.ming.springboot</groupId>
            <artifactId>ming-spring-boot-starter</artifactId>
            <version>1.0-SNAPSHOT</version>
        </dependency>
配置application.properties
#自定义启动器starter
com.ming.prefix=一起学习
com.ming.suffix=你学费了吗
测试
  @Autowired
    HelloService helloService;

    @Test
    public void starterTest(){
        String sayHello = helloService.sayHello("自定义starter");
        System.out.println(sayHello);
    }
本篇关于 SpringBoot 框架中的场景启动器 Starters 的介绍和自定义方法的内容就到此结束了,想要了解更多相关 Spring Boot 场景启动器 Starters 的其他内容请搜索W3Cschool以前的文章或继续浏览下面的相关文章,也希望大家以后多多支持!